LaTeX: How to create a document with LaTeX – Part 1

Using digital tools to version control code is slowly gaining favour among scientists, especially those who use computer programs to process and analyse data. When I first learned about version control, one of the most attractive features was the ability to version control manuscripts.
Anyone who has tried to write a scientific paper or research proposal knows the document often bounces between authors and collaborators many times as it is refined and before all involved parties are happy with it. The old school way of keeping track of comments made on a manuscript was to keep a date- and name-stamped copy for each author. The problem with this method is you end up with multiple copies of the manuscript, and it becomes impossible to recall or locate where a previous but potentially useful sentence was written, or who made a nuanced but perceptive comment.
In recognition of these problems, at Scientifically Sound we have put together a comprehensive but simple series of tutorials on using Git for version control, available here. Any version control software should also allow a user to see the difference between different versions of files, analogous to Word’s track changes function. Viewing differences between versions is straightforward for code files because these are usually text files. To version control and see the difference between versions of manuscripts, manuscript files need to be written as text files (not binary files such as Word documents).
LaTeX (pronounced “lay-tech”) is a text-based high-quality typesetting system. LaTeX is an older programming language and is especially powerful in typesetting math formulas, and with a little fiddling it is possible to generate and reproduce beautiful documents.
This is an introductory 2-part series on using LaTeX to generate PDF documents. Hopefully we will expand on this later on.
Set up. LaTeX is free software and comes in distributions for Linux (TeX Live), Mac (MacTeX) and Windows (MiKTeX). See the LaTeX Project for links. LaTeX can be called through development environments optimised for different user functions; we have found the cross-platform software Texmaker very nice to use.
Here are the bare bones to generate a PDF using LaTeX. In Texmaker, these lines will generate Figure 1.
1 2 3 4 5 6 |
\documentclass{article}

\begin{document}
This is the start of our adventures in \LaTeX.
This example shows how a \LaTeX document can be formatted.
\end{document}
|
Figure 1:
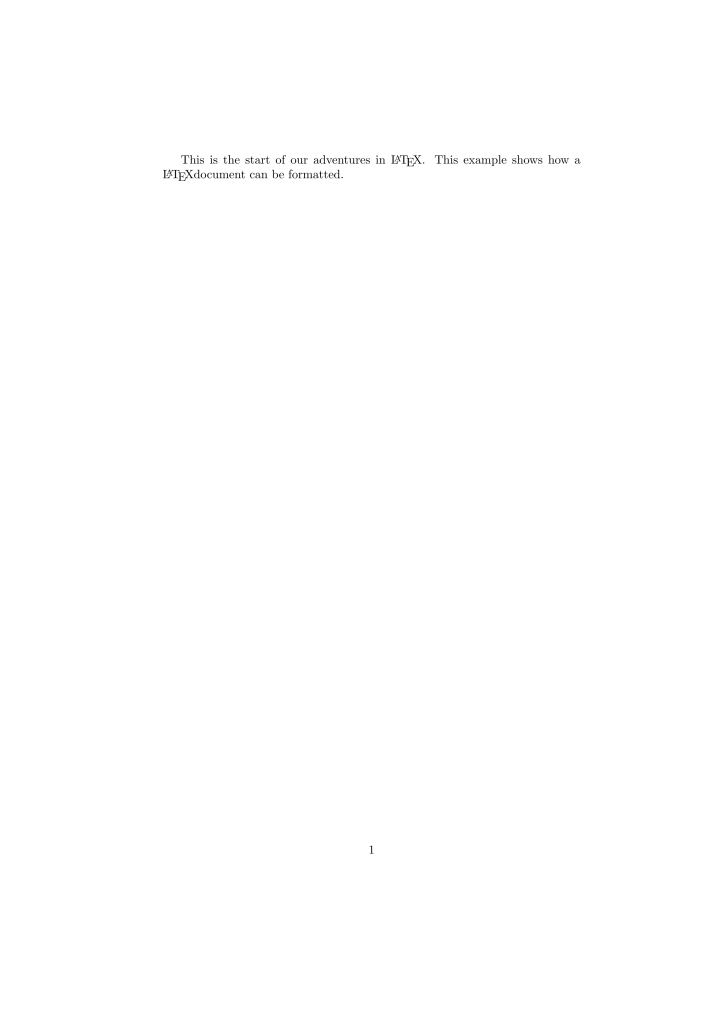
A backslash \ defines a function, and we pass input arguments to the function in the curly brackets {}. We first define the class of the document as an article, specify when a document begins and ends, and stick some text in between. Notice (1) functions don’t get printed to the PDF and (2) LaTeX thinks sentence 2 continues directly after sentence 1, even though sentence 2 was entered on a new line in the file. This means we can break up sentences in LaTeX files and view differences between individual sentences, but these sentences will appear as a single paragraph in the PDF.
Let’s pad out our file a bit more. The following lines are an expansion of the file above, with the output shown in Figure 2:
1 2 3 4 5 6 7 8 9 10 11 12 13 14 15 16 17 18 19 20 21 22 23 24 25 26 27 28 29 30 |
\documentclass[12pt,a4paper]{article}

\usepackage{parskip}
\usepackage[english]{babel}
\usepackage{blindtext}

\title{Our first \LaTeX document}
\author{A keen student}
\date{August 2016}

\begin{document}

\begin{titlepage}
\maketitle
\end{titlepage}

This is the start of our adventures in \LaTeX. \\
This example shows how a \LaTeX document can be formatted.

\section{Background}
\blindtext

\subsection{Jobs to do}
\begin{itemize}
    \item write up notes
    \item fix broken equipment
    \item discuss idea with team members
\end{itemize}

\end{document}
|
Figure 2:
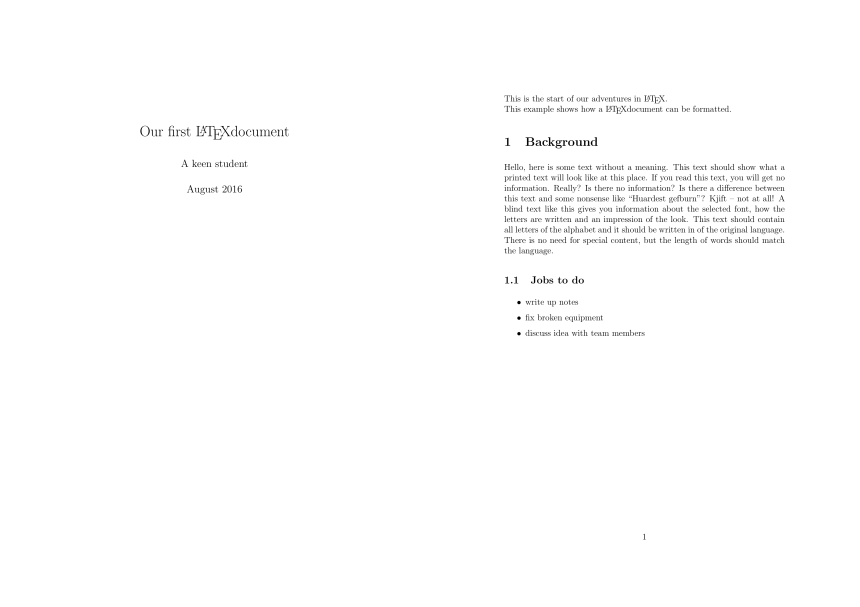
Line 1. For the article, specify font size 12 points and print as A4 size.
Line 3-6. Use the packages: parskip removes the indent from the first line of the paragraph, babel and blindtext are used to generate nonsense text as fillers in this example.
Line 7-9. Create a title, author and date.
Line 17. The double backslash \\ is used to force the subsequent text onto a new line.
Line 20, 23. Add sections and subsections to the text.
Line 24-28. Here’s how to create bullet points. A similar command to create numbered points is \begin{enumerate}.
Summary
We learned how to begin a document in LaTeX, create a title page, add sections and create bullet points. In the next post, we will work out how to add figures and tables to our files.
